Oversized Hooded Crochet Cardigan – Free Chunky Cardigan Pattern

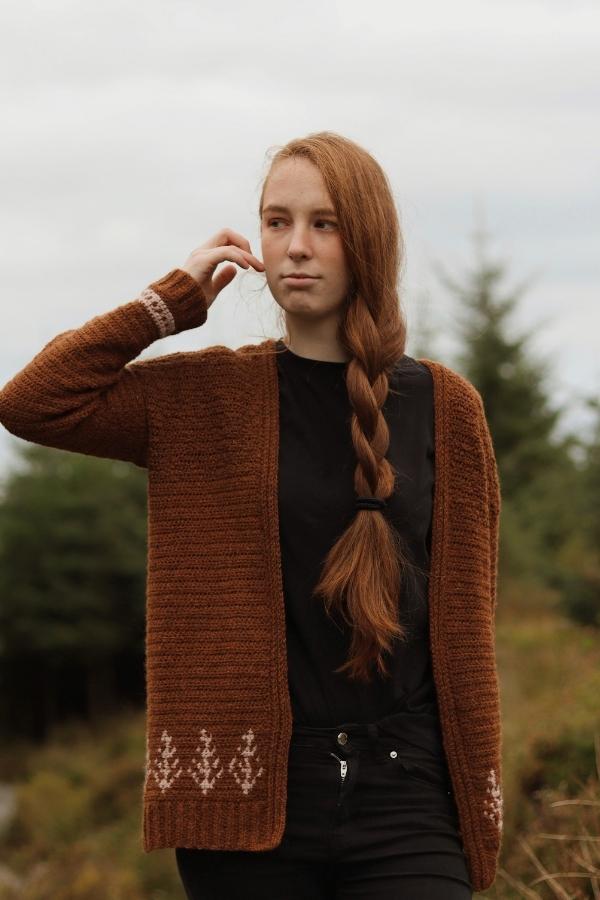
Wrap yourself in the warmth of this wonderfully chunky Oversized Hooded Crochet Cardigan, a striking design featuring deep, knit-inspired ribbing, a generously sized hood and a beautifully relaxed fit. With the stunning texture and roomy construction, this crochet cardigan has an almost jacket-like appearance, making it a fabulous outer layer for chilly autumn afternoons and frosy winter days.
One of the most distinctive features of this design is its impressive knitted appearance, achieved entirely with crochet stitches. The narrow ribbed sections along the hem and cuffs are created using slip stitch back loop only, while the main body and sleeves feature yarn over slip stitches that produce a pronounced, knit-look ribbed texture. The combination creates an attractive series of vertical ridges that give the cardigan depth, structure and a traditional knitted character.
The oversized fit is intentional, with wide sleeves, a loose fitting body and a dramatic hood that adds both practicality and visual interest. Worn over a fitted turtleneck, jeans and ankle boots, this chunky crochet cardigan makes a wonderfully distinctive addition to a cold weather wardrobe.
Despite its impressive appearance, the pattern uses a small selection of easy stitches and a panel based construction that is easy to follow. The width can also be adjusted by working fewer rows, allowing you to create a slightly more fitted cardigan if you prefer a less generous shape.
Whether you’re drawn to its bold ribbing, relaxed styling or oversized hood, this free crochet cardigan is a rewarding project for anyone who loves creating substantial handmade garments with beautiful texture.

How the Oversized Hooded Cardigan is Constructed
The Oversized Hooded Crochet Cardigan is constructed from seven separate panels, all crocheted sideways to create the lovely ribbed effect.
The design consists of one back panel, two identical front panels, two sleeves and two matching hood sections. Each body and sleeve panel begins with a foundation chain that determines its length. Rows are then worked back and forth until the required width is reached, making the dimensions relatively simple to customize.
The lower hem and sleeve cuffs are formed directly into the panels using slip stitches back loop only. This produces a compact, closely defined ribbing that contrasts beautifully with the broader knit-look texture of the main sections.
Yarn over slip stitches are used throughout the remainder of each panel, with stitches worked through the back loops to create the characteristic raised ridges.
Once the back and front panels are complete, they are joined at the shoulders. The sleeves are then attached, and the underarm and side seams are sewn together to form the body of the cardigan. The oversized hood is made from two separate pieces, each worked sideways using yarn over slip stitches. Simple shaping is incorporated into the hood sections before they are joined and attached to the neckline.
Finally a neat slip stitch edging is crocheted around the entire front opening and hood, bringing the cardigan together for a lovely finished appearance.
The construction requires no complicated shaping across the main body or sleeves, making this an approachable project for crocheters who are familiar with basic stitches and seaming techniques.
Crochet Oversized Hooded Cardigan at a Glance
- Skill Level: Easy
- Pattern Type: Chunky crochet cardigan with hood
- Yarn Weight: Weight 5 / bulky / chunky
- Crochet Hook: 6.5 mm
- Sizes: S(M, L, XL, 2XL, 3XL)
- Construction: Worked sideways in separate pieces
- Main Stitches: Slip stitch, yarn over slip stitch
- Texture: Knit look ribbing
- Fit: Generously oversized, with a relaxed jacket-like appearance
- Customization: Reduce or add foundation chains for length, reduce/add rows for width
- Terminology: US crochet terms
Yarn & Materials
**This post contains affiliated links for which I make a very small commission. It is of no extra cost to you but it does help me out a great deal**
When creating my Oversized Hooded Cardigan I used Stylecraft Special Chunky in the shade Parchment, a lovely neutral color that compliments the cardigan’s bold, ribbed texture.
Stylecraft Special Chunky is a weight 5 acrylic yarn with a wonderfully substantial thickness, making it well suited to garments designed for colder weather. Its chunky strands create beautifully defined stitches, allowing the vertical ridges to stand out while giving the cardigan its lovely, structured appearance.
The Parchment shade provides a soft, understated finish that pairs beautifully with the traditional knitted effect of the stitch pattern. However, the cardigan would look equally attractive in rich earthy tones, deep charcoal, forest green or a warm oatmeal shade.
You can substitute another weight 5 yarn, provided you achieve the correct gauge. bear in mind that variations in yarn thickness and fibre content may affect the finished measurements and overall weight of the cardigan.
Materials Required
- Yarn: Stylecraft Special Chunky, weight 5 / bulky / chunky, 100% acrylic
- Color Used: Parchment
- Ball Weight & Yardage: 100g / 144m / 157yds
- Yarn Quantity: 9(9, 10, 10, 11, 11) balls
- Crochet Hook: 6.5 mm
- Measuring tape
- Stitch Markers
- Yarn needle for seaming, weaving in ends
- Scissors
Yarn substitution
When choosing an alternative chunky yarn, I recommend making a gauge swatch before beginning. The yarn over slip stitch technique can produce slightly different results depending on the yarn and your individual tension.
Sizing & Measurements
The oversized Hooded Crochet Cardigan is available in six sizes, from S to 3XL, with a relaxed, roomy fit.
| Size | Finished bust | Back width | Length |
|---|---|---|---|
| S | 50″ | 25″ | 24″ |
| M | 54″ | 27″ | 24″ |
| L | 58″ | 29″ | 25″ |
| XL | 62″ | 31″ | 25″ |
| 2XL | 66: | 33″ | 26″ |
| 3XL | 70″ | 35″ | 27″ |
Gauge
13 yoslstsblo = 4 inches (10 cm)
If you prefer a slightly closer fit, you can reduce the number of rows worked across the back and front panels, or choose a smaller size. Remember to consider the proportions of the sleeves and hood when making adjustments.

Stitches & Abbreviations
- ch – chain
- slst – slip stitch
- slstblo – slip stitch back loop only
- yoslst – yarn over slip stitch
- blo – back loop only
- st(s) – stitch(es)
- rep – repeat
Special stitch:
Yarn over slip stitch (yo-slst): yarn over, insert hook into designated st, pull yarn through, pull first loop on hook through the next two loops on hook.
Oversized Hooded Crochet Cardigan Video Tutorial
If you enjoy learning through video demonstrations, you can follow along with my Oversized Hooded Crochet Cardigan tutorial on Youtube.
The video is a helpful companion to the written instructions, particularly when learning the yarn over slip stitch technique and creating the knit-like ribbing that runs throughout the cardigan.
Seeing the stitches worked step-by-step can also make it easier to understand the sideways panel construction, hood shaping and final assembly.
Crochet Oversized Hooded Cardigan Pattern
Back Panel
Ch 79( 79, 81, 81, 85, 87)
Row 1:
Slst into 2nd ch from hook, slst into each of next 6 chains, yo-slst into each of remaining sts. Turn.
Row 2:
Ch 1, yo-slst in BLO in each st across until 7 sts remain, slst in BLO in last remaining 7 sts. Turn.
Row 3:
Ch 1 slst in BLO in each of next 7 sts, yo-slst in each remaining st across. Turn.
Repeat rows 2-3 until back panel measures 25( 27, 29, 31, 33, 35) inches wide. Make sure to measure across the top edge and not the bottom edge of panel.
Fasten off.
Front Panel (Make 2)
Ch 79( 79, 81, 81, 85, 87)
Row 1:
Slst into 2nd ch from hook, slst into each of next 6 chains, yo-slst into each of remaining sts. Turn.
Row 2:
Ch 1, yo-slst in BLO in each st across until 7 sts remain, slst in BLO in last remaining 7 sts. Turn.
Row 3:
Ch 1 slst in BLO in each of next 7 sts, yo-slst in each remaining st across. Turn.
Repeat rows 2-3 until front panel measures 11( 12, 13, 14, 15, 16) inches. Make sure to measure across the top of the panel and not the bottom
Fasten off leaving a long tail.
Sleeves (Make 2)
Ch 59( 59, 59, 61, 61, 63)
Row 1:
Slst into 2nd ch from hook, slst into each of next 6 chains, yo-slst into each of remaining sts. Turn.
Row 2:
Ch 1, yo-slst in BLO in each st across until 7 sts remain, slst in BLO in last remaining 7 sts. Turn.
Row 3:
Ch 1, slst in BLO in each of next 7 sts, yo-slst in each remaining st across. Turn.
Repeat row 2-3 until sleeve measures 15(15, 16, 16, 17, 17) inches wide. Make sure to measure across the top edge!
Fasten off leaving a long tail.
Hood Section (Make 2)
Ch 49
Row 1:
Yo-slst in 2nd ch from hook, yo-slst in each ch across to end. Turn.
Row 2:
Ch 1 yo-slst in BLO in each st across. Turn.
Repeat row 2 until piece measures 9 (10, 11, 12, 13, 14) inches wide. DO NOT FASTEN OFF. Turn.
Next row:
Ch 1, skip first st, yo-slst in BLO in each st across to end. Turn.
Next row:
Ch 1 yo-slst in BLO in each st across leaving last st UNWORKED. Turn.
Repeat last two rows until entire piece measures 12.5(13.5, 14.5, 15.5, 16.5, 17.5) inches wide. Fasten off.
Assembly
Lay the front panel on top of the back panel. With a stitch marker mark 5.5( 6, 6.5, 7, 7.5, 8) on each front panel and attach to back panel. With a yarn needle and some yarn seam the outer 5.5(6, 6.5, 7, 7.5, 8) inches on each side.
Next lay your entire cardigan out flat with the wrong side facing up. With a stitch marker marker the middle of a sleeve, then line that stitch marker up with a shoulder seam. Using a yarn needle and long tail seam sleeve to cardigan. Repeat on the other side. Then fold cardigan over and seam along under edge of sleeve and down along the side of cardigan. Repeat on the other side.
Turn cardigan right side out.
Place your hood in place and seam to the body of the cardigan.
Next attach yarn to the bottom inner edge of cardigan and do 7 rows of regular slsts all the way around the inner edge and around hood.
Fasten off and weave in all ends.
You are now finished!